 Home
Home Health
 Diet & Nutrition
 Living Well
 More
MoreComing to a complete stop, you notice that you have to push down your brakes more than usual. In fact, your foot is almost to the mat. That’s a problem that needs to be fixed fast. The sponginess you feel when you apply brakes means you could have air or moisture in your system. Bleeding your brakes will flush out the impurities and keep your break system healthy and crisp. It’s a one- or two-person DIY maintenance project that requires a bit of coordination.
Your Prep List
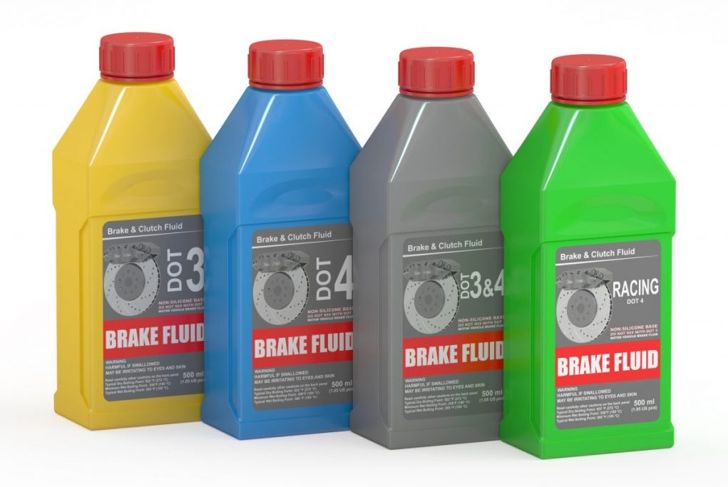
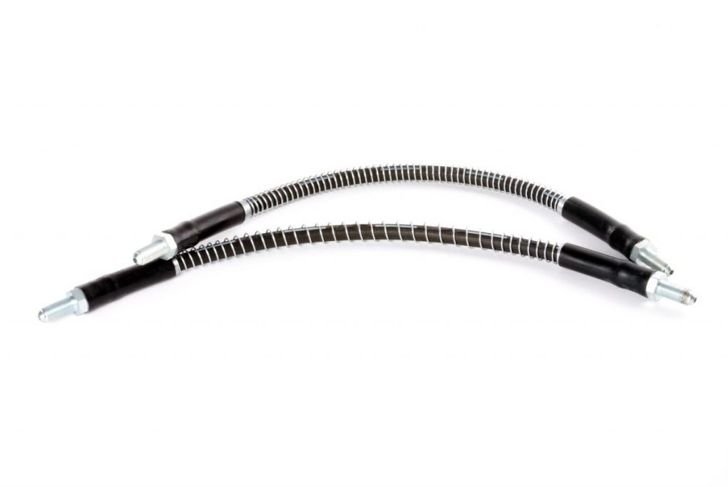
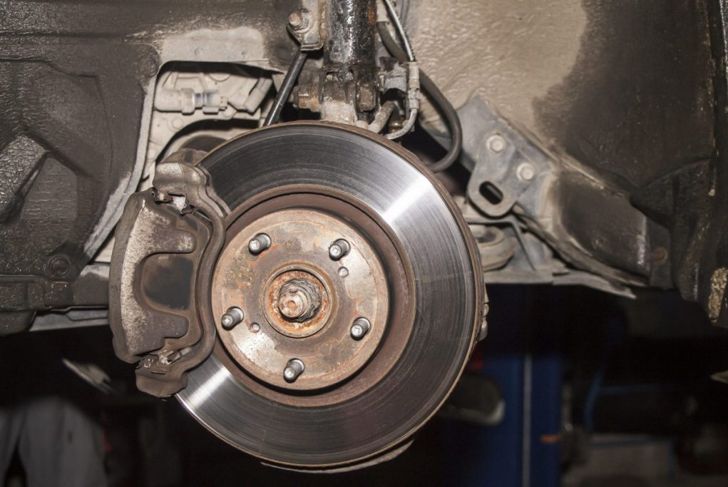
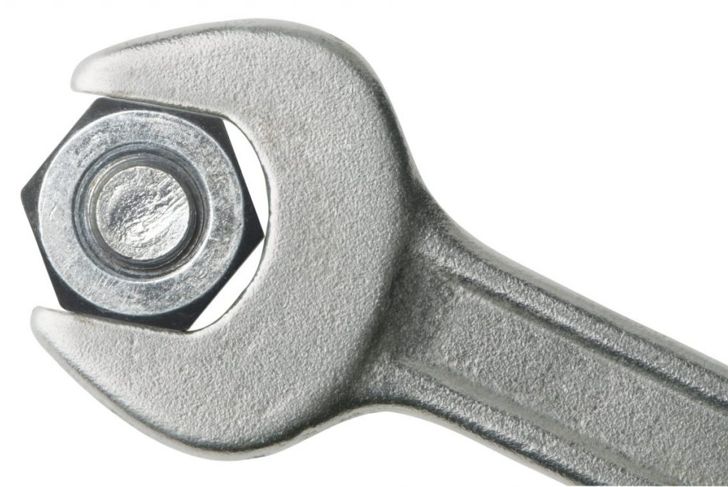
As far as any special tools, you need an 8mm wrench to loosen the bleeder bolts, two to three feet of 3/16- or ¼-inch clear plastic tubing, an empty, semi-transparent plastic soda bottle, fresh brake fluid, zip tie, and a helper. While it’s not necessary and will take extra time and tools, you can remove all four tires and elevate your car, so you can see everything better. While you may have old fluid stored, avoid using that because it could have air and impurities from when it was last used, Contaminating the flush makes the entire bleeding process moot.
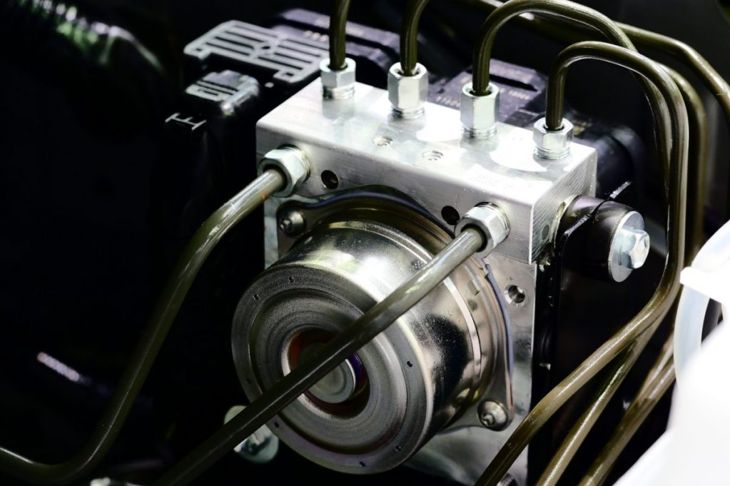
ABS Brakes
Antilock braking systems, ABS, are sensitive to contaminated fluid because the pump performs at thousands of pounds per square inch. The smallest abrasives can damage the valves and pumps. Flushing the system with fresh fluid regularly, once every couple of years helps to avoid that scenario. Some systems contain proprietary ABS technology that may be expensive to repair or replace.
Homemade Flushing Tool
The tool you make ensures the engine is flushed with fresh brake fluid. Drill a hole in the cap of your soda bottle and insert the hose, so that it touches the bottom of the bottle. The hose needs to be a bit narrower than the bleeder valve, ensuring a tighter seal. On the underside of the cap, use the zip tie to secure the hose, so it stays in place. Fill one-third of the bottle with fresh brake fluid and screw the cap tightly.
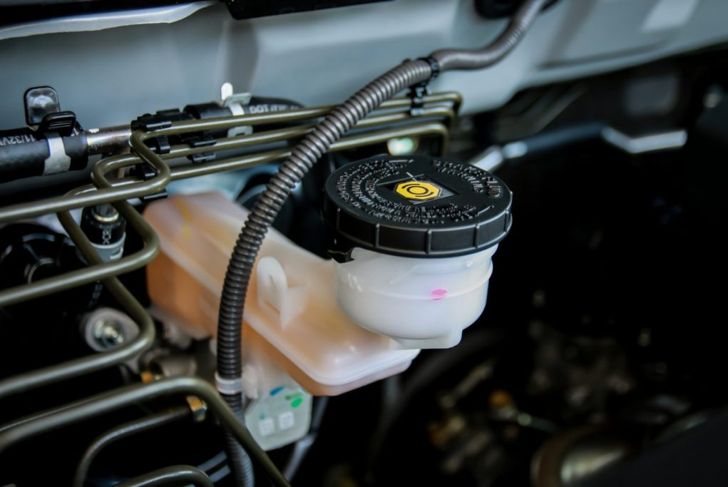
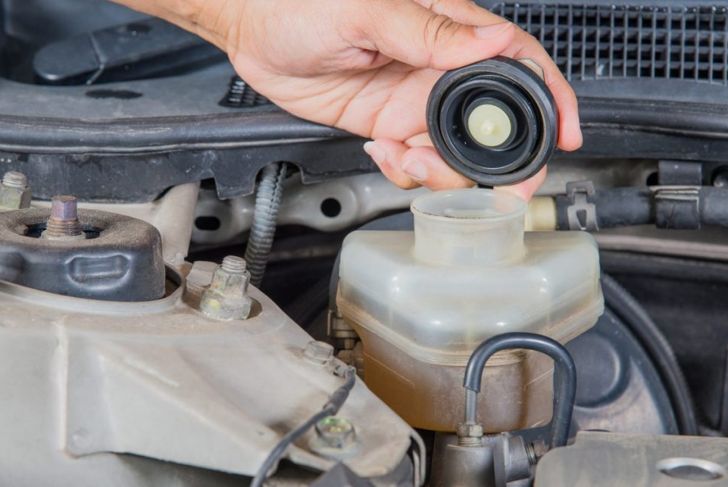
Top Off the Reservoir
Under the hood is the master cylinder reservoir. The exterior may be covered with some dirt and dust. Clean it off to ensure that none of that gets in the line while you’re cleaning. If the reservoir is less than full, top it off, because if it gets too low, it bleeds air into the lines and that defeats the purpose of the whole process.
Bleeding Order
Where you start depends on where your ABS is mounted. The idea is to start with the line that’s farthest from the cylinder. If the ABS is mounted towards the rear, the driver front side will be your starting point. If it is towards the front, then start with the passenger rear line. Go in a ‘Z’ pattern as you clean. For example, from the passenger rear, go to the driver rear, then passenger front and end at the driver front.
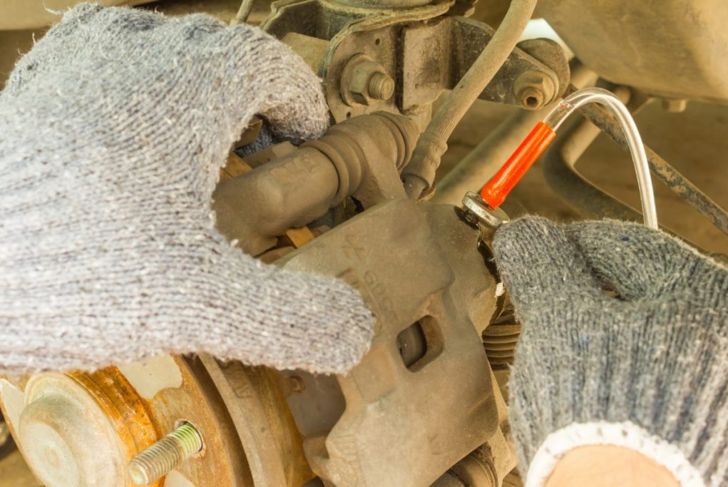
Position the Tool
When you’ve figured out at the farthest point, take your flushing tool and secure the end of the hose tightly around the bleeding screw. You’ll feel resistance, which is good because you need a tight seal to ensure that air doesn’t sneak in or fluid doesn’t spill out. Make sure you position the flushing tool lower down to make the process a little easier.
Open the Valve
If you’re dealing with an older valve, be careful about striping the screw. Using the box end of your wrench may help to avoid this. Put the box end over the screw before you add the hose. When you’re ready, apply a quarter turn to crack the bleeder valve. You don’t want to do more, or once you start the bleeding process, it will spill outside the thread and let air seep in. When everything is secure, it’s time for you or your special helper to pump the brakes.
Bleed the Line
You need to pump the brakes for a while so that all of the air moves out of the line. At the beginning, you will see air bubble gaps in the hose. After you’ve pumped the fluid for a few minutes, the gaps will disappear, and all you see is a continuous fluid line in the hose. This means the line is now clean, and you can move on.
Close and Move On
When you’re done with the line, close the bleeder valve tightly. Pinch the end of the hose as you remove it, so fluid doesn’t leak out. Hold the hose straight, so that all fluid goes back in the bottle. Check the master cylinder reservoir and top up, if necessary. Repeat steps 6 through 8 for the three remaining brake lines.
Proper Fluid Disposal
After the last line is bled, do a final check of your master cylinder reservoir level. If you chose to remove your tires, put them back on, and lower your car. While it may seem economical to save unused brake fluid, you need to dispose of all remaining brake fluid safely, because it is a toxic chemical that can’t just be thrown in the garbage or down the pipes. Return all old and unused brake fluid to the parts store or take it to your local junkyard. Both have the knowledge and means to properly dispose of this type of hazardous material.